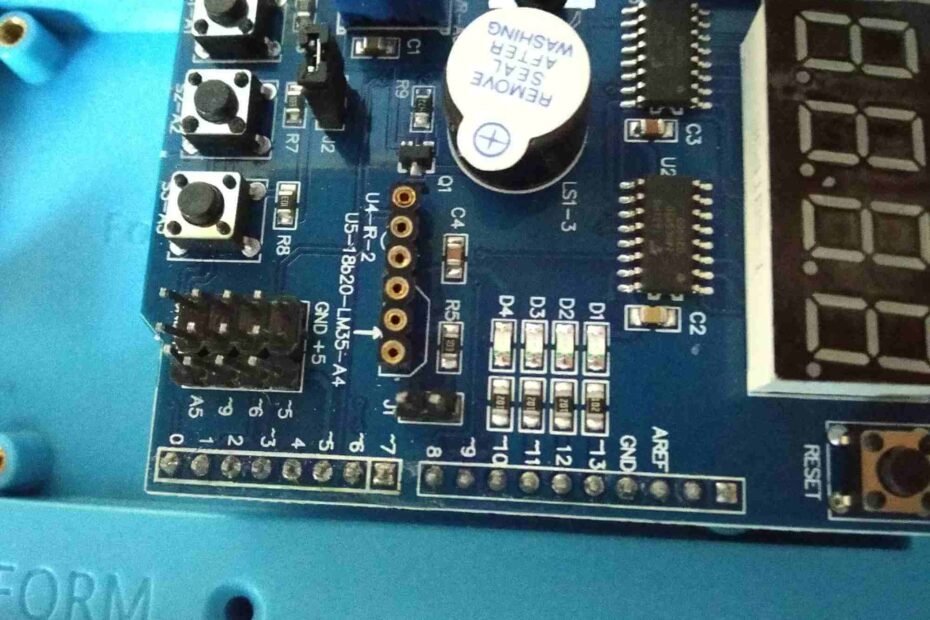

Hola! En esta ocasión voy a hablar de una placa interesante que me compré hace tiempo en Ali Express. Decir que la placa lleva tiempo existiendo, se puede emplear para hacer ciertos proyectos, y explicaré cómo usar algunas de sus partes.
La placa multi-función, debo de decir que me ha costado una tarde encontrar documentación respecto a ella, pero al final de la tarde investigando he logrado encontrar parte de los códigos para hacerlo funcionar. Al final del tutorial dejaré los enlaces en Inglés por si queréis echarle un vistazo.
Una fila de luces, una luz apagada yendo hacia abajo, he logrado hacer esto empleando el siguiente código:
int led1 = 13;
int led2 = 12;
int led3 = 11;
int led4 = 10;
void setup()
{

pinMode(led1, OUTPUT);
pinMode(led2, OUTPUT);
pinMode(led3, OUTPUT);
pinMode(led4, OUTPUT);
digitalWrite(led1, HIGH);
digitalWrite(led2, HIGH);
digitalWrite(led3, HIGH);
digitalWrite(led4, HIGH);

}
void loop()
{
digitalWrite(led1, HIGH);
delay(1000);
digitalWrite(led1, LOW);
digitalWrite(led2, HIGH);
delay(1000);
digitalWrite(led2, LOW);
digitalWrite(led3, HIGH);
delay(1000);
digitalWrite(led3, LOW);
digitalWrite(led4, HIGH);
delay(1000);
digitalWrite(led4, LOW);
delay(1000);
delay(1000);
}
Otro de los códigos los cuales he experimentado ha sido el siguiente, mostrando números del 0 al nueve:
/* Define shift register pins used for seven segment display */
#define LATCH_DIO 4
#define CLK_DIO 7
#define DATA_DIO 8
/* Segment byte maps for numbers 0 to 9 */
const byte SEGMENT_MAP[] = {0xC0,0xF9,0xA4,0xB0,0x99,0x92,0x82,0xF8,0X80,0X90};
/* Byte maps to select digit 1 to 4 */
const byte SEGMENT_SELECT[] = {0xF1,0xF2,0xF4,0xF8};
void setup ()
{
/* Set DIO pins to outputs */
pinMode(LATCH_DIO,OUTPUT);
pinMode(CLK_DIO,OUTPUT);
pinMode(DATA_DIO,OUTPUT);
}
/* Main program */
void loop()
{
/* Update the display with the current counter value */
int i;
int o;
for (i=0; i<4;i=i+1){
    for(o=0;o<10;o=o+1){
      WriteNumberToSegment(i , o);
      delay(1000);
    }
}
}
/* Write a decimal number between 0 and 9 to one of the 4 digits of the display */
void WriteNumberToSegment(byte Segment, byte Value)
{
digitalWrite(LATCH_DIO,LOW);
shiftOut(DATA_DIO, CLK_DIO, MSBFIRST, SEGMENT_MAP[Value]);
shiftOut(DATA_DIO, CLK_DIO, MSBFIRST, SEGMENT_SELECT[Segment] );
digitalWrite(LATCH_DIO,HIGH);
}
Por aquí dejo otro código, es parecido al primero pero moviendo el led de arriba para abajo:
const byte LED[] = {13,12,11,10};
#define BUTTON1 A1
#define BUTTON2 A2
int sumar=0;
int modulo=0;
void setup()
{
// initialize the digital pin as an output.
/* Set each pin to outputs */
pinMode(LED[0], OUTPUT);
pinMode(LED[1], OUTPUT);
pinMode(LED[2], OUTPUT);
pinMode(LED[3], OUTPUT);
Serial.begin(9600);
}
void loop()
{
if(!digitalRead(BUTTON1))
{

  sumar=sumar+1;

}
if(!digitalRead(BUTTON2))
{

    sumar=sumar-1;


}
if (sumar<=0){
  sumar=0;
}
if (sumar>=3){
  sumar=3;
}
//modulo=sumar

modulo=sumar
digitalWrite(LED[0],HIGH);
digitalWrite(LED[1], HIGH);
digitalWrite(LED[2], HIGH);
digitalWrite(LED[3], HIGH);
digitalWrite(LED[sumar], LOW);
delay(1000);
}
Sin más hasta aquí mi tutorial de hoy, espero que hayan aprendido algo, sin más me despido, un saludo y hasta la próxima.
Fuente:
http://arduinolearning.com/code/multi-function-shield-examples.php